Tuesday, November 26, 2013

CAMPAIGN DRESSER IS FINISHED AND A DINING ROOM MAKEOVER

My little $30 Craigslist Campaign dresser is done! As for the color I chose to go a deep navy blue. I originally had a lighter navy colored blue paint that I was going to use, but decided I wanted something darker, so I mixed in a little black with the navy color until I got the perfect shade I was looking for. I got my color mixed and ready then a little wood filler, taping, sanding and rolling on the paint and it's a whole new dresser! I did take off the handles and buried them in Brasso ( I went back 15 minutes later to check on them and they were blue..that kinda freaked me out a little, but they were fine.Wheww..Scrubbed them for a long time, I mean ALONG time, they were really corroded. As I was resting my hands after scrubbing that darn brass I got a switch twitch (the urge to switch and move random things) is what I am calling it now, so I started moving stuff around, so much for resting..hehe

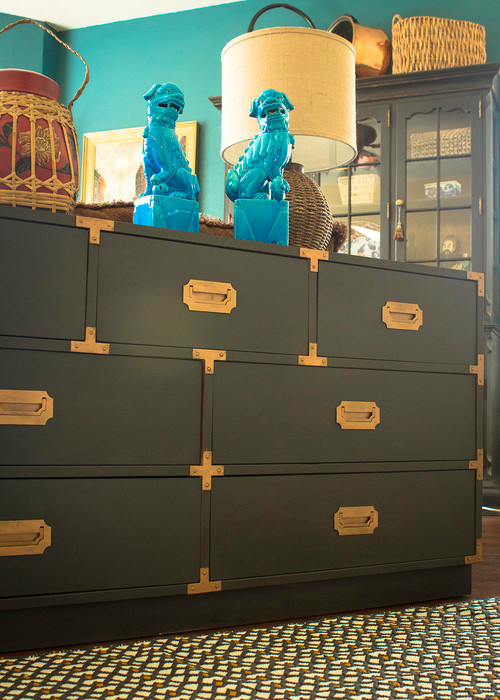
 It didn't cost me a thing for the new look, I just shopped my own house again. I grabbed my two Chinese Chippendale chairs (which were also a Craigslist score) and recovered the cushions (Kravet Riad fabric) and put them on either side to flank my new adorable campaign dresser. This dresser is much smaller than the other cabinet that I had in here, so I don't know if it was just that I was used to seeing something so much bigger that when I put this one in its place it looked not finished, too puny maybe, but after I put the two chairs on the sides I thought it looked much better.


I had these lamps sitting in my garage for a long time (Target clearance score from a couple years back) and decided to break them out, the color they were originally was like a dark greenish color, didn't mix well with the dark navy.


So spray paint to the rescue! My bestie spray paint.. First I primed them with 2 coats letting them dry completely before applying the second primer coat. ( Zinsser 123 primer works great) then used white lacquer,(Ace brand) using the same step, applied 2 coats letting them dry in between. I think they look so much better this color don't you? I am a high contrast kind of girl.


I added some black ribbon around the shades,put my coral, orangish tray that I got from Target a while back from the modern cottage collection, and boom totally different look.

 For a little somethin somthin extra to add to the dresser, I had a Chinese wind chime outside forever and took it apart and painted it gold then hung it on the handle with some clear fishing line, I actually really like how this looks, thought it would be too bulky but looks great :)


Here is a little before and after of the dining room area..

BEFORE


AFTER
And here is a before and after of the dresser..

BEFORE


AFTER


Well thats my little dresser/dining room revamp, nothing major but still different! I am so exited that its time to start doing some Christmas decorating this week, time to get in the holiday spirit! Yea my favorite time of year, cant wait, ! See you soon!

Thursday, November 21, 2013

OOPS I DID IT AGAIN, CAMPAIGN DRESSER

Who is a crazy happy buying dresser freak?? I am!! Okay so I know I said that my goal wasn't to buy anything that I didn't need..I know, I know. That is exactly what my husband said to me last night when he came home, after I kindly asked him to go with me and pick up a dresser..again, I had to through in a.. but honey, I have wanted one of these dresser foreva! It's only $30, that's unheard of! I had to get my point across that this was such a good deal, ya know. Well I must have gave some really good puppy dog eyes or something because it worked! He said okay if you really gotta have this thing lets go and get this over with. See I have heard these dressers are really heavy, if it wasn't for that I would have let my poor hubby stay home. Don't you wish that there was some magical pill you could take to make you strong for just 30 minutes? Just long enough to pick up a heavy dresser and put in in the truck. In my case, a crazy, blogger, Craigslist dresser buying pill if you will. Ya that would be awesome! On to the dresser, it has some cosmetic issues, not too bad, but for $30 I cant complain.


Oh and it was REALLY heavy, and a lot smaller in person than I expected, but still I am a happy girl! Now what color should this new addition be? I went online to see what kind of inspiration I could get as far as painting this baby, and there are so many colorful options, and they all look really good.

VIA
This green one I seen over and over again, this is a really popular photo.

VIA

This one is just like mine, really like this option.


VIA


Then there is classic black. I have noticed a lot of people really like the white option, but I think I am trying to get out of paint everything white mode. My hubby did say he liked the white which was a shocker because he usually has no opinion on my little projects, but for some reason I think he likes this guy as much as me. Time to go get my paint on, to the paint store I go. What do you guys think? Any opinions on a color choice?

Tuesday, November 19, 2013

A LAMP IN YOUR KITCHEN?

I was at Ross this weekend and spotted a cute little lamp sitting by itself on a shelf. I had some credit there so I put it in my cart. It was super cheap and I had credit so why not? I have a fetish for lamps, don't know why, but I do. I wanted to try it in my kitchen on my counter under the the cabinet. I thought would that look okay?  I like having a little light in the kitchen at night instead of having that big bright light on all the time, its more cozy. Well I did buy it and put on my counter, I left the wrapping on just in case I needed to return it. What do you guys think?


Ya or Na?

Friday, November 15, 2013

GOLD AND WHITE DEER HORNS

Happy Friday! I have been on a spray everything gold kick lately! I cant help myself! I did a little project yesterday with some deer horns I have had for about a year or so, I don't know if animal parts are on the outs as far as decorating goes, but I didn't jump on that band wagon until now. With Christmas around the corner, (I am reminded of that every time I turn the radio or T.V. on) for some reason gold and white antlers remind of Christmas. 
We finally put our bedroom T.V. on a wall mount so now I have extra space on the dresser for "stuff". For some reason when I have extra space I just gotta go and add something to "fill" it up. Its a problem I have, a real life problem! Anyways here is what the horns (or antlers) looked like after I just sprayed them white..


They need Gold don't ya think? YES! To make stripes (what I wanted) just use some painters tape and wrap around, super easy..


I took a plastic bag and tape to cover the white part I didn't want sprayed like this..


 Spray with gold paint, I used Krylon in gold leaf, my favorite gold spray paint.


Let it dry and peel off the tape and Bam, Gold Bling!


I have one more set to "bling" out. I am going to use them somewhere in the living room as part of my Christmas decor this year, which I will be starting to pull out that stuff sometime in the next week :) Things are not safe right now muahaha..from my gold spray paint, but I am gonna try and control myself. Hmm a gold painted tree???  Have a Great Weekend!

Tuesday, November 12, 2013

BLACK FRIDAY SHOPPING

I have been contemplating going out this year and doing some Black Friday shopping, but I am a little disappointed that most stores are on the bandwagon of starting their sales on Thanksgiving. What is with that? It's not even Black Friday any more it Black Thursday! If you are contemplating this, in my experience you have to pick the store that has the best deals (Target all the way for me) and wait in line outside of the store for at least 4 hours for them to open the doors to get those deals. One year we waited in line for 4 hours mind you in the freezing cold (make sure to dress warm and bring a thermos with something hot in it along with a few snacks too) and by the time the doors opened the line outside had grown all the way around the entire building wrapping it once over! I know, crazy!! So by the time those back of the line people get into the store all the deals are pretty much cleared out. This is why.. when those doors open it complete chaos! People running like crazy people filling their carts!


And when inside it gets like this.... Instantly..


These poor guys, a million people and questions flying around, and some of these folks are not nice at all, learned that the hard way one time.. So I figured if I don't wait in line outside before the doors open to be one of the first people to enter the store, what is the point? Maybe some people like the thrill of the experience instead of the actual shopping? I am there for the deals, but sadly they are gone in a instant, in someones shopping cart that beat you to it. 


So, I would essentially have to "give up" Thanksgiving so that I can be in line waiting since now most stores open at 8pm on Thanksgiving day :( What to do?  I am on the fence this year, but when your on a budget for Christmas this is THE DAY of DAYS to get it done. I have tried to shop on the internet instead of going out to the stores and almost always the sites crash...and I cant get through! What is a girl to do??  If you are going out be safe, never go alone, bring snacks and warm stuff to drink, and have a cell phone for emergency's. Any one else planning to head out this Black Thursday?

Thursday, November 7, 2013

GRASSCLOTH NAILHEAD PANELS TUTORIAL

Hey! As I promised here is the tutorial to the Nail head Grass cloth Panels. Let me first start by saying if you are going at this solo be prepared for it to take a lot longer than you anticipate, nailing in all those nail heads are very time consuming! I used around 4,000 nail heads! I know crazy! 

The first step was to gather my building materials which were:
  1. Three sheets of 1/2 or 3/4 inch plywood 
  2. Grass cloth wall paper,  (one roll)I used THIS stuff (HGTV Coastal Cool Grass cloth)
  3. Wall Paper Adhesive ( I used This) bought from Walmart, I used almost 2
  4. Nail Heads ( Got mine from eBay from THIS seller) 4,000!
  5. Trim for the outsides, I got the cheapest stuff my local hardware store had
  6. Primer In any color (it seal the plywood so that the wallpaper glue doesn't seep into the wood)
  7. Brad Nails for applying the trim
  8. Wood Filler
  9. Wood Glue
  10. Sandpaper
  11. Paint for the trim
  12. D rings for hanging the panels on the wall
Now the Application materials:  
  1. Rubber Mallet
  2. Felt tipped pen
  3. Pattern ( I downloaded mine from Sarah off her blog HERE)
  4. Lots of Patience and a pillow to rest your knees on
I got my plywood for free from Craigslist so I had to cut my own, two cut at 3feet wide, 6 feet tall and the other I just cut the length to 6 feet and kept the 4 feet as it came. I used my level to make sure that my line was straight before I cut it.


After I got my wood cut, I primed the side I was going to put the grass cloth on again so that the wallpaper glue stands on top of the wood and doesn't seep into the pores. After the primer was dry, I got out my wallpaper glue and applied it to the boards, then applied the grass cloth.
I carried inside and started on the first panel. Get your pattern and poke holes through the dots and lay it down on the panel and start getting the pattern on it, I learned it is much better if you copy down the pattern on the entire panel first before you start applying the nail heads.Oh and learn from my experience dont let anyone else try and help with coping the pattern ,its tedious and when your in the zone stay there! My dear hubby tried to help but kinda messed up...oh well..


After the pattern is down Start getting those nail heads in! This is the time consuming part but also very gratifying when you start seeing the nail heads make the pattern and come to life. Use a rubber mallet for this, a regular metal hammer will damage the nail-heads finish.


After all the nail heads are applied cut your trim to fit, Paint, then glue together the mitered edges and then apply to the outsides of your panels with brad nails. Fill in the holes where your brads are with wood filler, sand and touch up with paint. Apply your D rings to the back of the wood, make sure you put these baby's in studs cuz they are Heavy!! Hang up and your done! Wheww.. I would do it again because I LOVE them did I say LOVE!!!! them! I decided that I would hang a mirror I got from Target in the center of the center panel, It helps with my light issues (bounces the light off the panels) and it looks pretty too!


What do you guys think? Would you ever do a project like this? I cant help myself, when I see something that I totally love I have to give it a try! Thanks again Sarah for your inspiration! See you guys soon!

Tuesday, November 5, 2013

GRASSCLOTH NAILHEAD PANELS DONE!

Remember when I posted about THIS project around a month or so ago? Well, I am finally finished! This was one of the longest projects I have ever done to date. That being because I did most of it by myself, my hubby did help me some but not too much. I got this idea from the crazy talented Sarah M. Dorsey, she is a rock star blogger, and she whips out these crazy good D.I.Y. projects like they are nothing. Here is the LINK to her blog on her grass cloth wall. Sarah made an actual "wall" which is what I considered doing too, but I didn't have the room to make one that big (I would have had to empty my entire living room almost to have the room) that didn't sound like any fun, and knowing it would take along time I didn't want to live that way. My solution to this was that instead of an entire wall, I made three "panels" and hung them together like this..


I was hoping to have enough grass cloth left to put behind the panels to cover the entire wall, even if I had to cut the paper in half to fit behind just the openings, but nope, there just isn't enough left. I cant justify buying another roll just to do this because it is on the more spendy side, more on this side than I like, so this is how it will stay. I do LOVE how this turned out, it's a  huge statement wall and because it is behind the sofa it looks like it was done intentionally and not just thrown up there because it was pretty. This is definitely the focus of the room now instead of the T.V. yea for that!

I do have one flub, can you spot it? The hubs and I were both coping the pattern on the same panel and well lets just say he messed up, I am gonna blame him this time..it's okay he knows..anyways I will be back tomorrow with the full details on how I made it, until then here are some more pics! Have a great day!


I will be sharing this on the linky party over at LisMarieBlog HERE, check out all the talented peeps over there!

Friday, November 1, 2013

BAMBOO DRESSER'S NEW SPOT

Happy Friday! I have finally decided on putting the bamboo dresser I painted last Saturday in my bedroom. It seemed like the most obvious place to put a dresser but sometimes I like things a little mixed up, like a dresser as a T.V. console or as I was thinking as a dining room buffet. But it was easier to do this for the time being, you never know it might end up in the dining room tomorrow..I did manage to keep my hands off the white paint and leave it blue, but again you never know it might be white in a week. I am still letting the color sit for a while but so far so good!


Have a great weekend!!