Tuesday, May 6, 2014

BAMBOO BLINDS AND YARD SALE

I have always loved the look of bamboo blinds with curtains in magazines and other blogs but never pulled the trigger on buying my own, not sure why I haven't before, maybe its that I don't have a Lowe's or a Home Depot any where near me and its seems most people buy from these two places.

I am a visual person and sometimes buying online, colors and other details are different online (computer screen I should say) verses when you get them in front of you. Like in my last POST. So maybe that's why it has taken so long.

Sometimes I just go for it and if I don't like it or its different than the picture I usually just return it unless its a huge item and its way too much hassle, and I like to buy from sites that have a return policy, that can make or brake a sale for me. But back to the blinds..

I knew I wanted tortoise shell bamboo blinds with the bamboo slats being chunky and not those itty bitty little sticks, and I wanted them to be on the lighter color side, didn't want the espresso color, I was looking for more of a "natural" color.


 I went on an online hunt for the absolute cheapest but what I wanted blinds, and I did find exactly what I was looking for this time! Well almost. I have a huge sliding door in my living room that is 105 inches wide and I think 85 inches tall. That makes it impossible to find one humungous blind to fit my humungous "window" door. So my solution was two blinds hung together, I have seen a lot of that happening and I was fine with that. The problem was that the blinds I found were 72 inches wide each, so that was a lot of overhang.

My solution was to rap the ends of the blinds in painters tape while they are rolled up, mark where they needed to be cut and just used my chop saw and sliced the ends right off. It worked like a charm. I took pictures of this process but my memory card in my camera got corrupted and I lost them..but if anyone wants details just email me :)


I do love the texture and warmth it added , I hung them up by myself and hung the right blind a little off which makes the middles where they meet a little gapie so I must fix that and  I am so happy that these are Roman Shade Style so they actually look like blinds when raised, no roll at the bottom.So happy I found these guys!

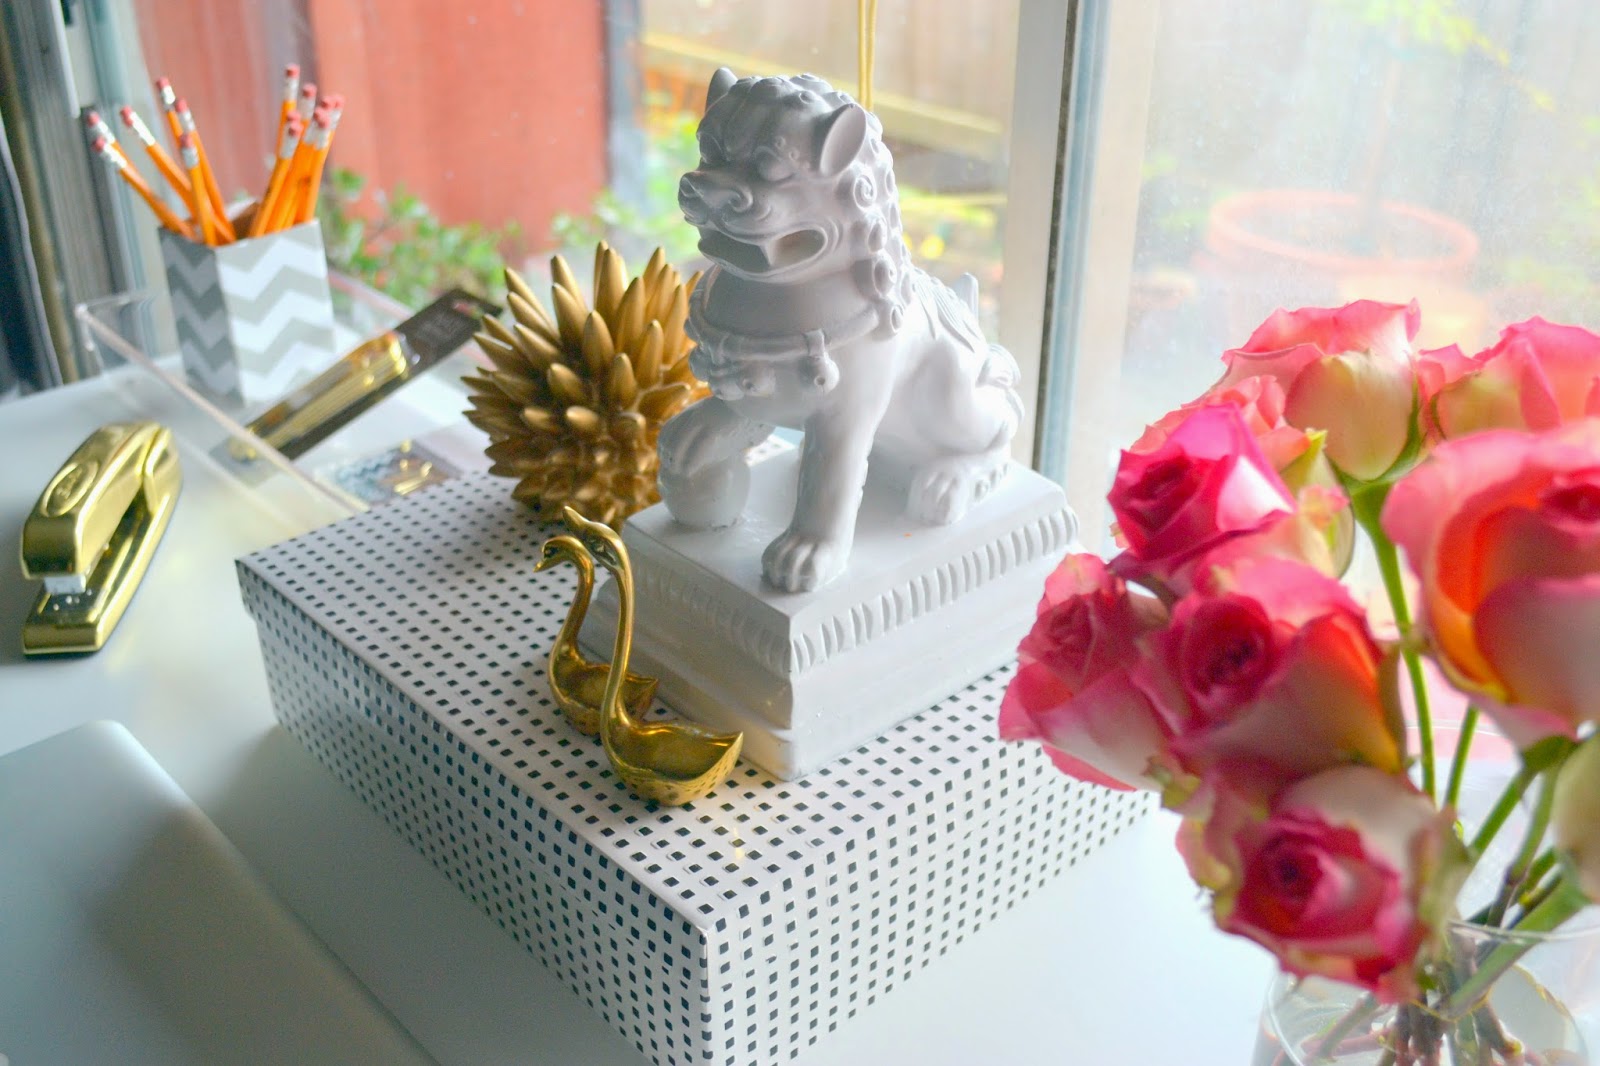
Also I wanted to share what I picked up at a yard sale on Saturday.. I am liking little animals as of late especially brass or gold ones :) 

I seen these little guys for 50 cents and just had to bring them home..


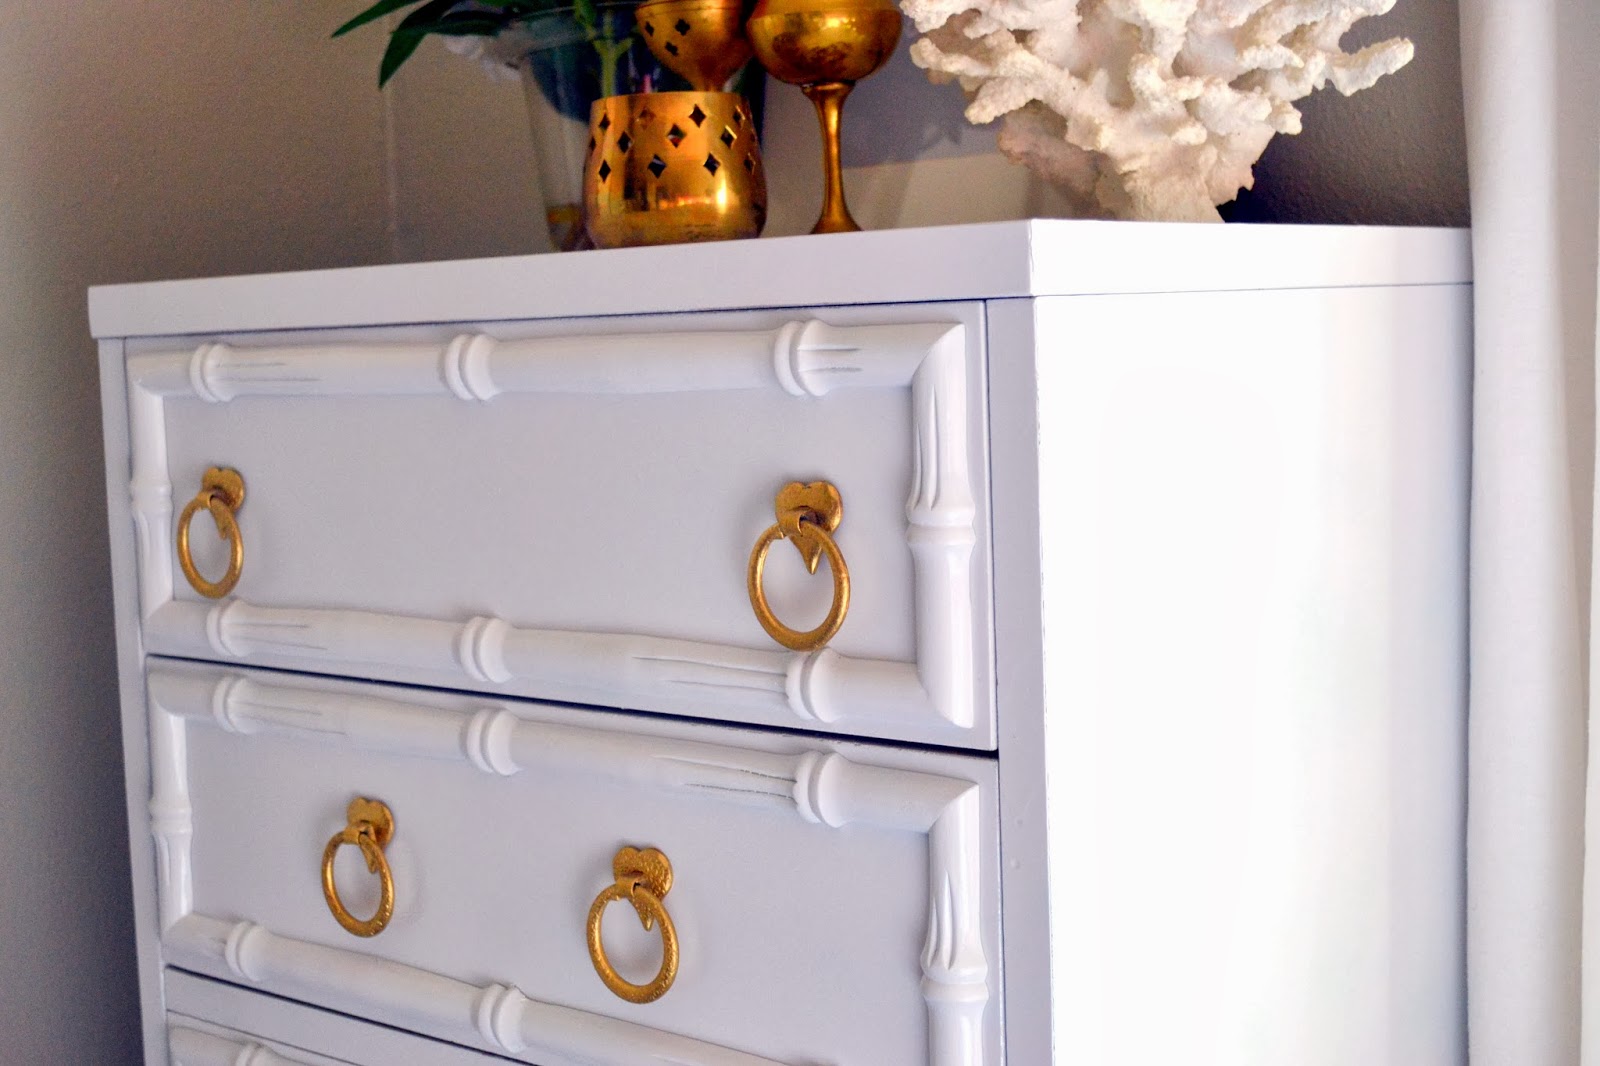
When the blinds are down they pop out against the bamboo :)
Anyone else a fan of little golden animals? 
See you guys soon!

Wednesday, April 16, 2014

NEW DINING ROOM BANQUETTE AND DECIDING ON PILLOW FABRIC

As you can see in a second in the picture below, my dining room is on the small side and when I have company over we can only fit just the 4 chairs around the table, which limits how many people can actually sit like a grown up at the table. Its a bummer, so I looked around at some ideas on Pinterest and my solution was to go with a dining banquette, I figured that should solve my seating problems? I hoped..

I went ahead and ordered one from Overstock that was on sale, and on top of the sale price I also had a coupon code that was emailed to me, so I got a really good deal. My only complaint is that it took almost 6 weeks to arrive, and lots of back and forth phone calls regarding the delivery issue (how long it was taking) and so on, but FINALLY it did arrive! Overstock was great and returned a lot of my money back for all the hassle and waiting. 

I couldn't be happier it's so much better, it totally provides that extra seating that I needed! Now a normal person should be fine and dandy with the seating problem solved right?  Well not me...I am so not normal I have concluded.. and here is my dilemma..

I inspected the photo of this banquette several, several times to make sure that it would match my existing dining chairs and I was convinced that this banquette would totally match, ha darn computer monitor lies.. it so lied.. It doesn't match and I just am not digging the color mixture of the two. 


I know in this picture they look like they match, but believe me they don't (see that monitor is so deceiving sometimes). The banquette is more of a greyish and the chairs are beige. I know the littlest things drive me nutso I just cant help it, I annoy myself and my poor hubby I am sure, So I decided if I could just recover those chairs I would be much happier. I searched for some fabric at a deep discount and picked up some this fabric, ($34.99 for the entire yardage) which was 4.5 yards, Score! I am hoping it will be enough to recover the three chairs. I just want to make the tight fitted slip covers just to cover the beige existing fabric. This way I can remove them and wash them if I need too. Sounds so easy in my head, but once I get the fabric in front of me I realized I have no idea what the heck I am doing..


Again I  have never made slipcovers so I think I will be watching a lot of You Tube videos in my near future. Hopefully I can learn a little, be brave and just go for it. I will keep you posted on that.

I also want to make some pillows for the banquette (boy that's a lot of sewing). I have these two remnants, (just threw the fabric over a couple pillows) and I am not sure if I want both or just pick one fabric, it might be a lot of pattern going on with the chairs also in a pattern too although all the fabric is from the the same designer and I have seen all these mixed before, but I am on the fence.


Oh the decisions..any opinions? I am off to start my video watching, See you guys soon!!

Monday, March 17, 2014

ANOTHER CHEAP WAY TO FRAME OUT YOUR PLAIN CABINET DOORS

 I loved how my bi-fold doors came out so much that I decided to also pretty up my hall cabinet doors too! I used the same materials as I did in the bi-fold door project, MDF trim, wood glue and wood filler, that's it! Fast, and easy I promise. 

I roughly sketched out some idea of the door design...


At first I thought about just simply framing them out with no real "design", but then I thought that was no fun and if I am gonna do this it cant be too "plain". I didn't want a real busy pattern either, I have a love for graphic patterns everywhere else in my house so I didn't want to compete.

I decided to go with sketch number two, almost similar to three but without the added trim on the insides of the doors. 

Here is what they looked like before: Pretty plain and in need of a paint job..


Here was my first step:
First I measured the width and length of the doors an calculated how much trim I would need, I purchased 16 feet of mdf which was plenty and it only cost me $4.23!

I cut my trim down, basically to "frame" the outside edges.
Next I cut 8 small squares (of the same mdf trim) all the same size, and applied them to all the corners after I "framed" out the edges. I used my brad nailer and wood glue to apply all the trim. 


After I cut my trim down it literally took my like 5 minutes to apply it, so easy! Cutting it was super fast too. 

Next I used wood filler to fill in all the gaps so that it looks as seamless as possible.
After the wood filler dried, I sanded it down, gave it two coats of paint, and I was finished!


Paint still wet in this pic :)

Not bad for a $4.23 project! Now my doors have some pizazz and personality!

Here is a before and after just for kicks again..

BEFORE

AFTER

 
I don't think I have anything else to "trim" out on my list yet, but I am eyeballing those kitchen cabinet doors.. so maybe I will tackle those too, but I haven't decided yet :) 

Are you guys doing some projects to spicen plain things up in your home? I think its that time of year! See you soon.

Thursday, March 6, 2014

TRIMMING OUT MY BI-FOLD PANTRY DOORS

I know a lot of people have those plain flat not so attractive bi-fold doors in their homes, am I right? I do, one of which is seen in the main part of my house from all rooms. My kitchen pantry door. Where there once were pulls on these doors now remained two very large holes from opening and closing the door so many times, the pulls literally created holes, then one day they just fell out. So instead of buying new doors I came up with a way to make them pretty and reattach some new pulls. 

First I measured my doors length and width, then determined how many feet of trim I would need, I needed around 63 feet but wanted to make sure I had a little extra just in case I made a mistake. I hate having to go back to the hardware store mid project because I ran out of something, so by buying five 16 footers I would have extra. 

I picked up some 2 1/4 inch MDF trim x 5, total cost $21.00.

I started at the top and measured the left side of the left hand door, but left an 1/2 inch gap closest to the wall so that the trim wouldn't hit the wall when the door opens. I made my first cut with my chop saw, put some wood glue on the back and stuck it on, My brad nailer was giving me issues so I used a clamp to hold the first one on until I got it working. 

Sorry for the weird shadows, it was really dark and gloomy on this day..

I did the same step for the next piece, it going right next to this one at the top on the same door. Then I measured length wise taking off  2 1/4 inches from the measurement (for the bottom trim piece), glued then nailed in. I repeated this process until both doors were trimmed out, remembering to leave that 1/2 inch gap on the right side door, like you did on the left, next to the wall so it doesn't interfere with opening the door.


Next up are the pieces that go in the middle of the trim you just attached. You can make any design you would like two pieces of trim in the middle to make three insets or 4 or 5 whatever tickles your fancy. I wanted five insets so I had to cut eight pieces of trim per door. I recommend measuring for each piece of trim, they will have a slight variance.


After all the trim is on I starting using wood filler to fill in all the nail holes and seams, let that dry, sand it and its ready to be painted!


Sorry for the TERRIBLE pics couldn't get a good one to save my life!


I Love the details it added to this plain old door! This was super easy and didn't take a lot of time to do and it only cost me $21.00, now I wanna trim out every door and cabinet in my house!

Oh and I have two options for the pulls:

This one...


Or this one..


The first option is a vintage set of pulls I have had for a while, I don't really dig the green back round so I think I am gonna try and paint it a different color, and then choose. After I choose I will get a better after pic for you (come on sun shine already).

If you guys have any questions for me on how to do this just let me know, I am off to see what other doors and cabinets need some loving, after I decide on the pulls and attach them, gotta finish this one first! Have a Great Day!!

Wednesday, February 26, 2014

CRAIGSLIST LINGERIE CHEST TURNED JEWELRY CABINET

I know its been awhile since I have posted, I guess I have been in a slump lately, and super busy. I have found myself not really having time to be creative, and when I do have a small amount I haven't been using it wisely.. but I guess if you love something you have to make the time. I really am going to try and set aside as much time as I can from now on :) SO now on to my first little project in a while..ready? 

I have a lot of jewelry, now its mostly costume jewelry not the real expensive stuff, but still have accumulated a lot of it over the years. When I would go into my jewelry box to find something it would take more time and effort than it should ever take, it's a little frustrating, but I fixed that! 

I found this lingerie chest on Craigslist for $20, and the fist thing I thought of when I seen it was that it would be perfect for my jewelry debacle. It definitely needed a makeover, but to me that is the fun part, right?


This is the picture from the Craigslist ad, its faux bamboo too, one of my favorites! These are made in the 70's and I personally think these older pieces are made so much better than the "new" stuff.


It was a little adventure getting this home, I got lost, and it started to rain and I didn't bring a tarp, but it survived.. fun times :)  I brought it in a cranked the heater to make sure it was good and dried out. I got to work on this the next day, the sun came out all day this Saturday finally, time to get my paint on. These were my weapons of choice...


First it got a good cleaning, and then the primer went on (love this primer) I did two coats. Next after primer was good and dry I used the Rust-oleum spray paint, this stuff is awesome too sticks to just about anything, I did three coats of the paint. After it all dried it looked so much better! But those pulls were not me so they had to go. I had these ring pulls that I got from a yard sale, they were on some old kitchen cabinet doors and the owners said that if I took all the doors they would be just give them to me, so I brought all the doors home and took off each pull, it took a little time but they were free. I gave them all a coat of the gold spray paint, attached them a wallah!


SO much better right? I love how it turned out. I had some plastic organizers not being used so I popped them into the drawers and loaded the jewelry in. I think the next Ikea trip I make I will be looking to get some better organizers but these will do for now.


It is so much easier finding what I am looking for now, and will be even better when I get more organizers, but in the mean time this has made it easier and saved me from some frustration :) For about $30 (that's both the chest and paint) for a HUGE jewelry box customized to me is fantastic!

How about you guys? What little changes has made your everyday life easier? I have another little change up happening in my head that I plan on doing very soon that I think will make life easier, I will be back soon to share!  Take Care!

Monday, February 10, 2014

WEST ELM CAPIZ CHANDELIER

Have you ever found yourself in a store where they are having some outrageously good sales, sales that are so good that your heart races and palpitates with excitement, and walk away with something that you don't need or doesn't serve a purpose or function, but its so beautiful and cheap you cant walk away? This happened to me ( shameful me) a couple weeks ago. 

We were in San Fransisco for another one of my little ones doctor appointments, after all of our business was taken care of we ventured around a little with the help of our GPS of course, its crazy in the city, you WILL. Get . Lost.. and I stumbled upon a West Elm, I have NEVER been to this store,(I know crazy right) only browsed online but never physically been to an actual store,  I walked in a was in Love! But before actually going inside of the store while I was parking I noticed that at the back of this West Elm in the back parking lot workers were stacking and unloading stuff from what looked like their stock room leaning things against the building and laying rugs, lights, all kinds of things out, then came  the sign that said 70% off everything! Jackpot! I parked and noticed other people starting to walk that way, I spotted something while walking (okay speed walking) something shimmering from the sun shining on it. A Capiz Shell Chandelier! It was gorgeous, and had no price tag...I thought this has gotta be pricey, but I will ask anyways, which I did, when the lady said she would let me have it for $20.89 (.89 is code for no returnable I guess) I had a heart palpitation! A few of them! 

I didn't NEED it and really didn't know where I could use it, but I just couldn't walk away from it because of the price and it was gorgeous. I love you West Elm! Lets just say I am always going to try my best to hit this store every trip :)

I decided to put her above my coffee table in the living room, I have never tried this idea before but I gotta say I love how it looks. When the sun coming from my window shines on it it makes me happy, $20 for a happy room isn't so shabby.


I am trying to hide those dreadful popcorn ceilings...and I have not figured out how to get rid of that  reflection from my mirror, it drives me nuts, but you can see the beauty of those shells!


Are you a sucker for a sale? I guess I am officially a sale sucker these days..

Monday, February 3, 2014

BRASS PHARMACY DESK LAMP

I was out at my local thrift shop last week browsing around, really just wasting a little time before an appointment, no better place to waste time in my opinion, I went to the lighting section looking for a small lamp for my desk, something with a small base to leave as much room as possible for my things and spotted this awesome solid brass pharmacy light! Holy cow I have wanted one of these for a while and who would have thought I would find one at a thrift store?  I thought to myself "I have to get over there  to that shelf where it  is sitting to snatch it before someone else does" (yes this has happened to me more than once, someone snagging something before I could get to it)I walked very fast but not so fast that I drew any attention to myself (at least I hope not). I tried to pick it up all not shalontly and almost dropped it on the floor! This baby is super heavy! This is a good sign, its not a cheapie light weight light,nope it sold and heavy and brass! Woohoo!


It has some tarnish that badly needs to be cleaned but nothing that some brasso and a good scrubbing cant fix.I hope to get this done soon. Maybe that's what deterred other buyers, but I can see the potential in things, some tarnish and dirt I can see through.I found my new  desk lamp, and I am in love, its the perfect size and it was crazy cheap!


Any one else find a great deal on something thrift shopping recently? Do you think thrift stores hold some great treasures? I do! See you guys soon!

Tuesday, January 14, 2014

STATEMENT CHAIRS AND A GREAT GUIDE ALL ABOUT THEM


 Hi Guys! Hows Your New Year coming along? So far so good ? I hope so!


I wanted to share with you guys today this fabulous resource guide by One Kings Lane they call their "Home Decor Resource Guide". This is a great, informative page filled with all the information you could ask for about Statement chairs and lots of other furniture. It covers history,style,time periods, everything you would need to know to identify any chair! Wouldn't this make a great App for those who shop thrift stores and antique shops?

 One of my favorite subjects is Statement Chairs (wish this was taught in school I would have definitely aced this class) I LOVE me some chairs and find that my home is definitely not in need of these, I have them in every room! And why you say? Because they make me happy, and of course the obvious, everyone needs a place to park their tushes after a long day, or just a day at home hanging out with your family, right? Maybe you need some extra seating for when company comes over, or maybe you just have the ONE chair that is your vocal point in a room that makes you smile when you walk into that room? Escaping to a room to read a good book. With every room's decor add in another style statement chair, you can never go wrong with a cute chair in my opinion. Not sure how to incorporate your own statement chair into your decor?  Here is some great tips on how to do this on their web site.


Statement chairs always will and always have been  a vital part of design and function, they can "make" a room, adds that extra something, something to a space, ya know what I mean?  They can really define your personal taste too. When I walk into a home I can most of the time sum up a persons taste by just looking at what style their furniture is. Its kinda a fun game for me! Not always does this formula of mine work, I have several friends that have many different "styles" happening but the important thing is to make them cohesive with one another, like similar fabric choices or painting in similar colors, the possibilities are endless!
 

I am such a HUGE chair fan, think I already said that, but just wanna be clear on this subject,I and cant imagine my home without them. I have to say that I also LOVE the thrill of the hunt for awesome chairs . One Kings Lane is a great place to find that this is "THE ONE" I have to have it piece.

 "THE ONE" statement chair I had to have in my home is definitely my Chinese Chippendale Arm Chair, well really I have three. But I just Love the details with the fretwork and the fact that on a whim I can repaint them or change out the seat fabric for a whole new look. Like this..


Changing out the fabric is fast and easy and can totally change up the look, gotta love fast and easy! Here are some photos of my go to Statement Chair, I throw a pillow in the back and read a book to escape sometimes, I love this little spot in my room.


The next time I am on the hunt for a new statement chair I will be referring to One Kings Lane's Decor Resource Guide, it can really make the choice a lot easier with their tips.

Hope you all have a terrific day, and I will see you soon!

Tuesday, January 7, 2014

Blue Ikat and Black and White Stripes

Hi Guys! Hope your new year is off to a great start! I have had a long vacation this season to spend time with the family and make new memories, it has been great, but its time to get back to normal which I am also exited about!

My mother in law was here for a week from Los Angeles visiting for the holidays and she is always up for a good shopping trip, my kind of lady! She says that things are much different up here in Northern California, that the thrift stores are cheaper and have much better stuff, and the sales are better here too? Who would have thought that? I thought for sure it would be better in a big city, but according to her, no. Maybe its just there is less people here, so more stuff left to shop for.. maybe that's it.

My Shopping buddy(mother in-law) and I were at Ross looking for some after Christmas deals and I ran into this really cool blue and white Ikat rug! It's a 5x7, 100% cotton (yea can wash it) and the price was soooo good, $26.99!! For a 5x7 rug that is unheard of! I couldn't walk away from a deal like this so It came home with me. Rugs are right up there with my pillow hoarding problem... 


The black and white striped basket I found at Target, its from the RE Style Collection, its perfect for holding my Christmas gift (a Silhouette Cameo) supplies! My hubby did good this year with his gift!  The basket was $24, a little pricy but I couldn't resist, I had some Christmas gift money to spend.


I am doing some re-arranging again, got the itch after I started taking down the Christmas decorations. After I am all done I will show you guys what I managed to change up. 


This week  I will be talking about accent pieces, chairs in particular! I have a problem with those too..See you soon!